RISC-V BOOM core + linux + bbl porting : my work history in Nexell
1. source download
$ repo init -u git://git.nexell.co.kr/nexell/riscv/manifest
$ repo sync
2. build guide
sifive source 를 기반으로 porting 및 customize 하는 부분은 생략. Nexell repository를 사용하는 방법에 대한 설명이다.
[ Full build or first build ]
$ cd riscv-boom-ref
$ tar xvzf buildroot.tar.gz
$ tar xvzf linux-4.6.2.tar.gz
$ tar xvzf riscv-gnu-toolchain.tar.gz
$ make -j12
[ 개별 build 및 설명 ]
- linux build
$ ./build-linux.sh or $ cd work/linux $ make clean $ cd ../../ $ make -j12 linux build 시 work/sysroot 를 묶어 rootfs 로 만든뒤 vmlinux에 붙여준다. 이후 bbl.bin 으로 다시 생성된다. - pk build - bootloader(bbl)
$ ./build-pk.sh of $ cd work/riscv-pk $ make clean $ cd ../../ $ make -j12 vmlinux 및 sysroot를 제외하고, riscv-pk 만 다시 빌드하여 bbl.bin 을 생성한다. - buildroot build
$ build-buildroot.sh
of
$ rm -rf work/buildroot
$ rm -rf sysroot
$ cd buildroot
---(optional)---
$ make riscv64_defconfig
$ make menuconfig
---(optional)---
$ make clean
$ cd ../
$ make -j12
만약 sysroot에 임의로 파일을 추가/삭제가 필요한 경우(test를 위해서)에는 work/sysroot 에서 적절히 작업 후 linux build를 수행하면 된다.
3. running on target board
target board (FPGA board)에서 bbl.bin, BOOMConfig.cfg 을 load 하고 BOOM core 를 reset 할 수 있는 환경이 있어야한다.
target board를 는 ssh 로 연결하여 사용하는 것으로 가정한다.
target board setup(bit file burning) 참고 : RISC-V FPGA Test guide
(local) $ scp -r tools/target-tools/* {myServer}@192.168.1.xxx:/home/abc/anywhere/
(remote) $ cd /home/abc/anywhere/
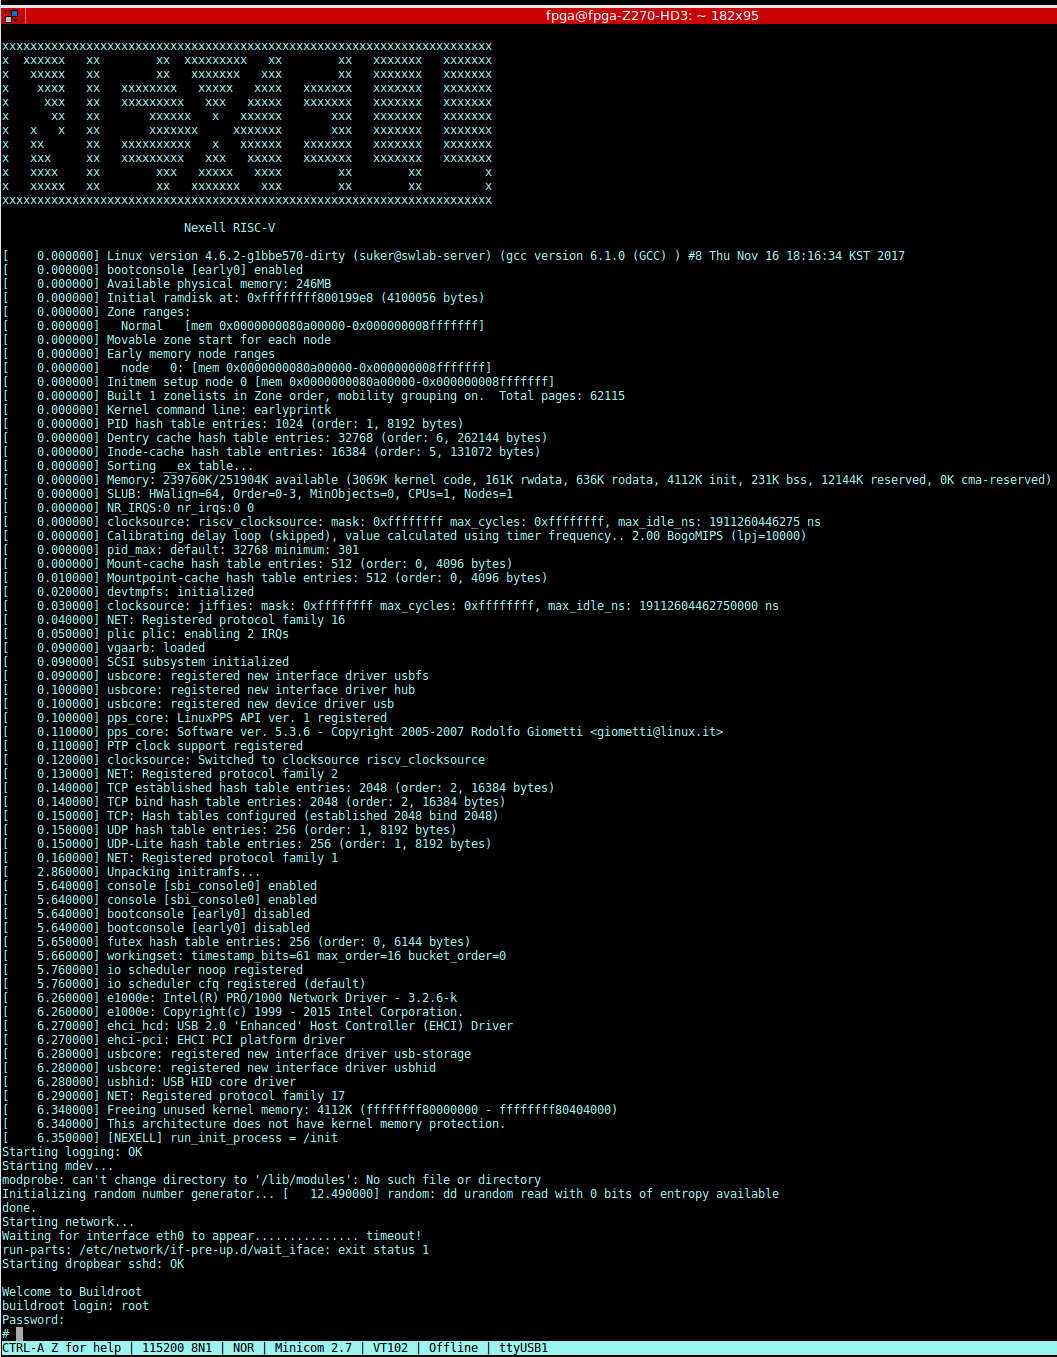
(remote) $ ./run.sh
ID : root PW : nexell

4. buildroot customize
buildroot 를 customize 하고 싶을 때 두 가지 방법이 있다.
첫번째 방법은 work/sysroot 를 수정한뒤 linux build(위의 3. build guide참고) 를 실행하는 것이다.
build time시 root filesyste을 다시 생성하여 vmlinux에 묶어준다.
두번째 방법은 buildroot 를 menu config을 사용하여 re-build 하는것이다.
$ rm -rf work/buildroot
$ rm -rf work/sysroot
$ cd buildroot
$ make clean
$ make riscv64_defconfig
$ make menuconfig ==> 수정
$ cd ../
$ make -j12
5. working history
http://swjira.nexell.co.kr:8091/pages/viewpage.action?pageId=29196612
http://swjira.nexell.co.kr:8091/pages/viewpage.action?pageId=29982966
http://swjira.nexell.co.kr:8091/pages/viewpage.action?pageId=29984053
http://swjira.nexell.co.kr:8091/pages/viewpage.action?pageId=30310684
- a. BOOM spec 확인.
- b. riscv-tools.git 소스를 이용하여 qemu 동작 확인
$ git clone https://github.com/riscv/riscv-tools.git $ git submodule update --init --recursive $ make CROSS_COMPILE=../riscv-gnu-toolchain/bin/riscv64-unknown-elf- ARCH=riscv vmlinux $ export RISCV=/home/suker/RISC-V/riscv-gnu-toolchain/ ==>? pk build ==> --with-payload=vmlinux - c. yocto base 로 작업하는 것이 더 쉬움.
$ repo init -u ssh://{USER_ID}@git.nexell.co.kr:29418/nexell/riscv/manifest $ repo sync $ cd repoRISCV/yocto/riscv-poky $ repoRISCV/yocto/riscv-poky$ source oe-init-build-env $ repoRISCV/yocto/riscv-poky/build$ bitbake core-image-riscv $ repoRISCV/yocto/riscv-poky/build$ runspike riscv64 - d. FPGA board based work - riscv-tools.git source base 로 작업.
$ git clone https://github.com/riscv/riscv-tools.git
$ cd $TOP/riscv-tools $ git submodule update --init --recursive
$ sudo apt-get install autoconf automake autotools-dev curl libmpc-dev libmpfr-dev libgmp-dev gawk build-essential bison flex texinfo gperf libtool patchutils bc
$ export RISCV=$TOP/riscv
$ export PATH=$PATH:$RISCV/bin
$ ./build.sh
bbl (bootloader)에 debugging 용 assem code 를 삽입하여 debugging
- e. riscv-toolchain build시 CFLAG, LDFLAG 옵션에 따라 동작이 달라짐.
- f. hart (hardware thread) 에 대한 이해가 필요함.
- g. bbl 을 만들때 vmlinux 를 with-payload option 으로 붙여서 만드는 이유를 알 수 없어, 따로 떼어서 작업함. bbl에서 vmlinux를 load elf 하여 동작시키도록 함. –> 실패.
- h. sifive source 를 reference 로 하여 재 작업함 (sifive - freedom-u-sdk : https://www.sifive.com/documentation/freedom-soc/freedom-u500-vc707-fpga-dev-kit-getting-started-guide/)
- i. sifive 에서는 bbl+vmlinux+sysroot 를 하나로 붙여서 bbl.bin 을 만들어 사용함. base ver : linux 4.6.2 $ git clone –recursive https://github.com/sifive/freedom-u-sdk.git $ cd freedom-u-sdk; make
- j. sbi_console tty driver가 내장되어있는것으로 보임. Nexell uartlite IP 와의 정합 작업이 필요함을 인지하는데까지 시간이 걸림.
- k. uart resigter 초기화 및 TX, RX validation check routine 을 추가하여 정상 부팅 확인함.
6. trouble shooting
- a. first build시 toolchain 을 생성하여야하기 때문에 오랜 시간이 걸린다. build 환경에 따라서 다르지만 약 1시간 가량 소요된다.
- b. riscv-tool-chain 은 버전에 따라서 linux build option 이 따라간다. build가 잘 안될시에는 build 시스템의 환경 변수에 RISCV 설정을 확인해본다.